Tutorials / Vendor directory
Vendor directory
Add vendors, keep their details current, and read the compliance flag that tells you who needs attention.
- 1
Add a vendor
From Vendors, choose New vendor. Give it a name and a contact email — that address is where questionnaires will be sent — then pick a specialty and field from your category lists and tick the states the vendor operates in.
- 2
Find vendors fast
The directory searches by name and filters by category and state, so “every electrician we use in Florida” is two clicks. Each row also carries a compliance flag summarizing the vendor's open audit period:
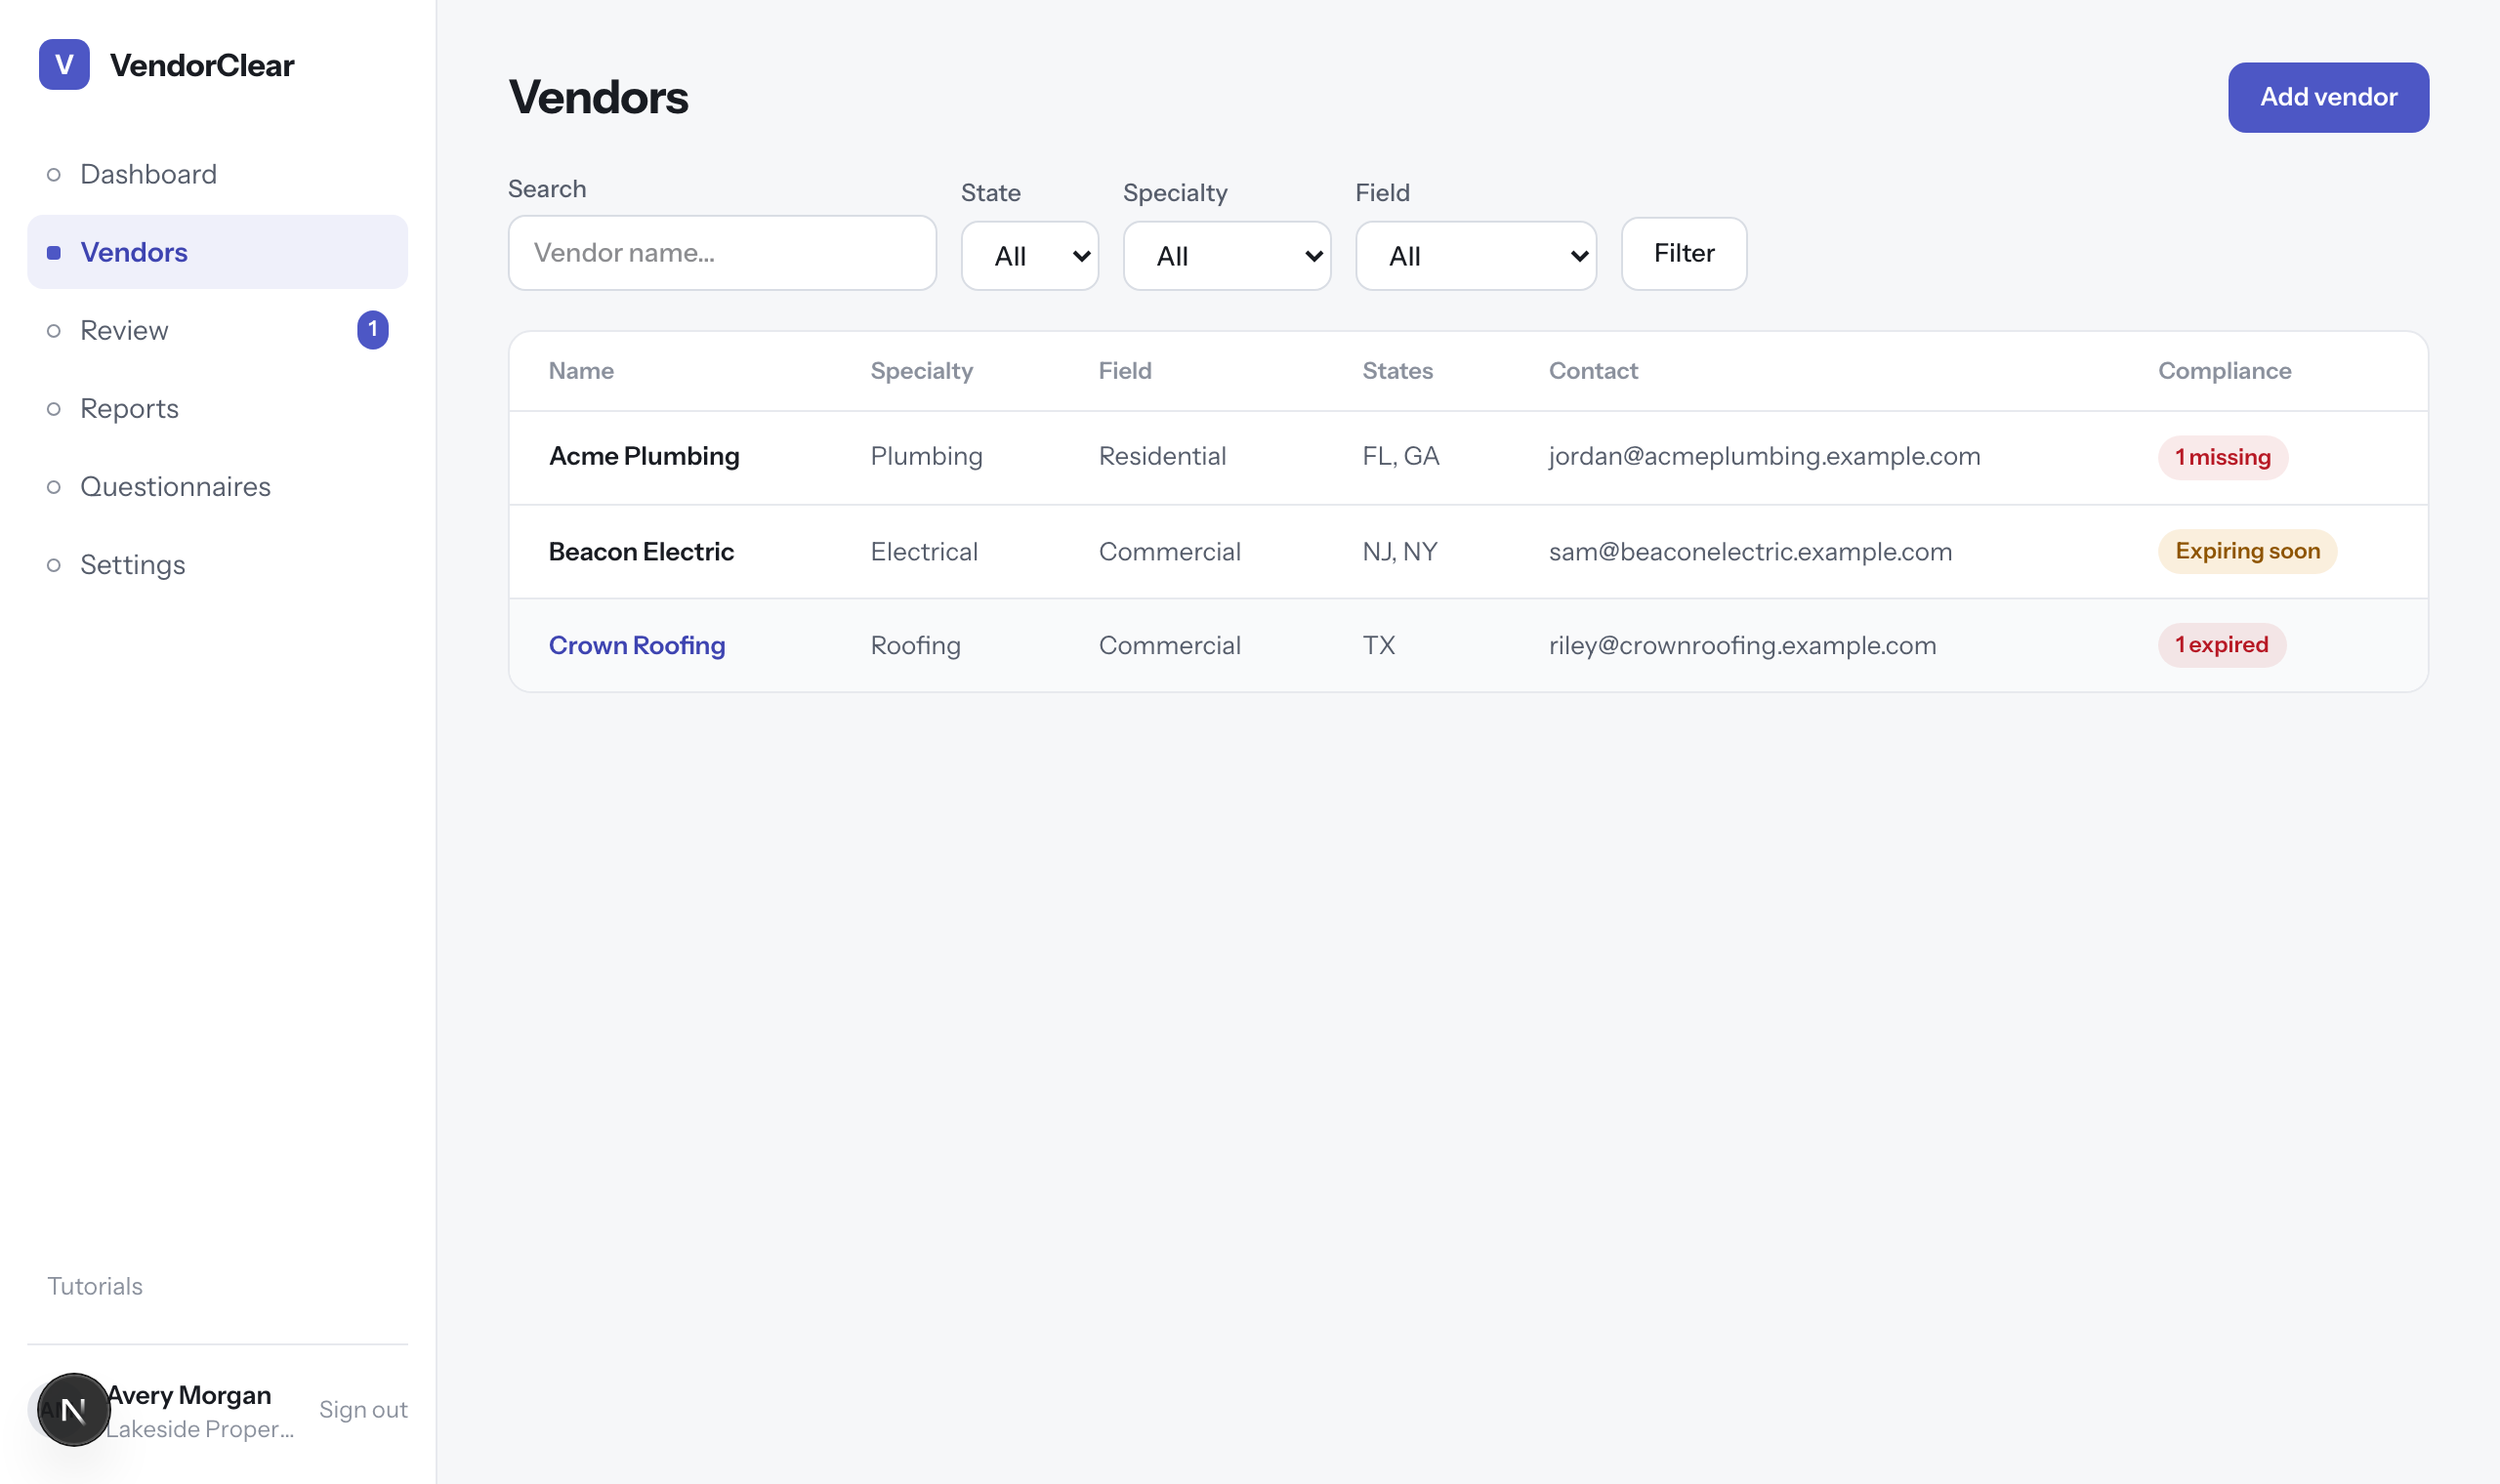
The directory — search, filters, and a live compliance flag per vendor. Red means something is expired or missing, amber means a document lapses within your warning window, and green means the vendor's checklist is fully satisfied.
- 3
Work from the vendor profile
Click a vendor to open their profile: contact details, audit period history, questionnaire activity with outcomes, screening runs with their PDF evidence, client approvals, and the buttons that kick off each of those — Start audit period, Send questionnaire, Run screening, and per-client Approve toggles (see the Reports & client approvals guide).
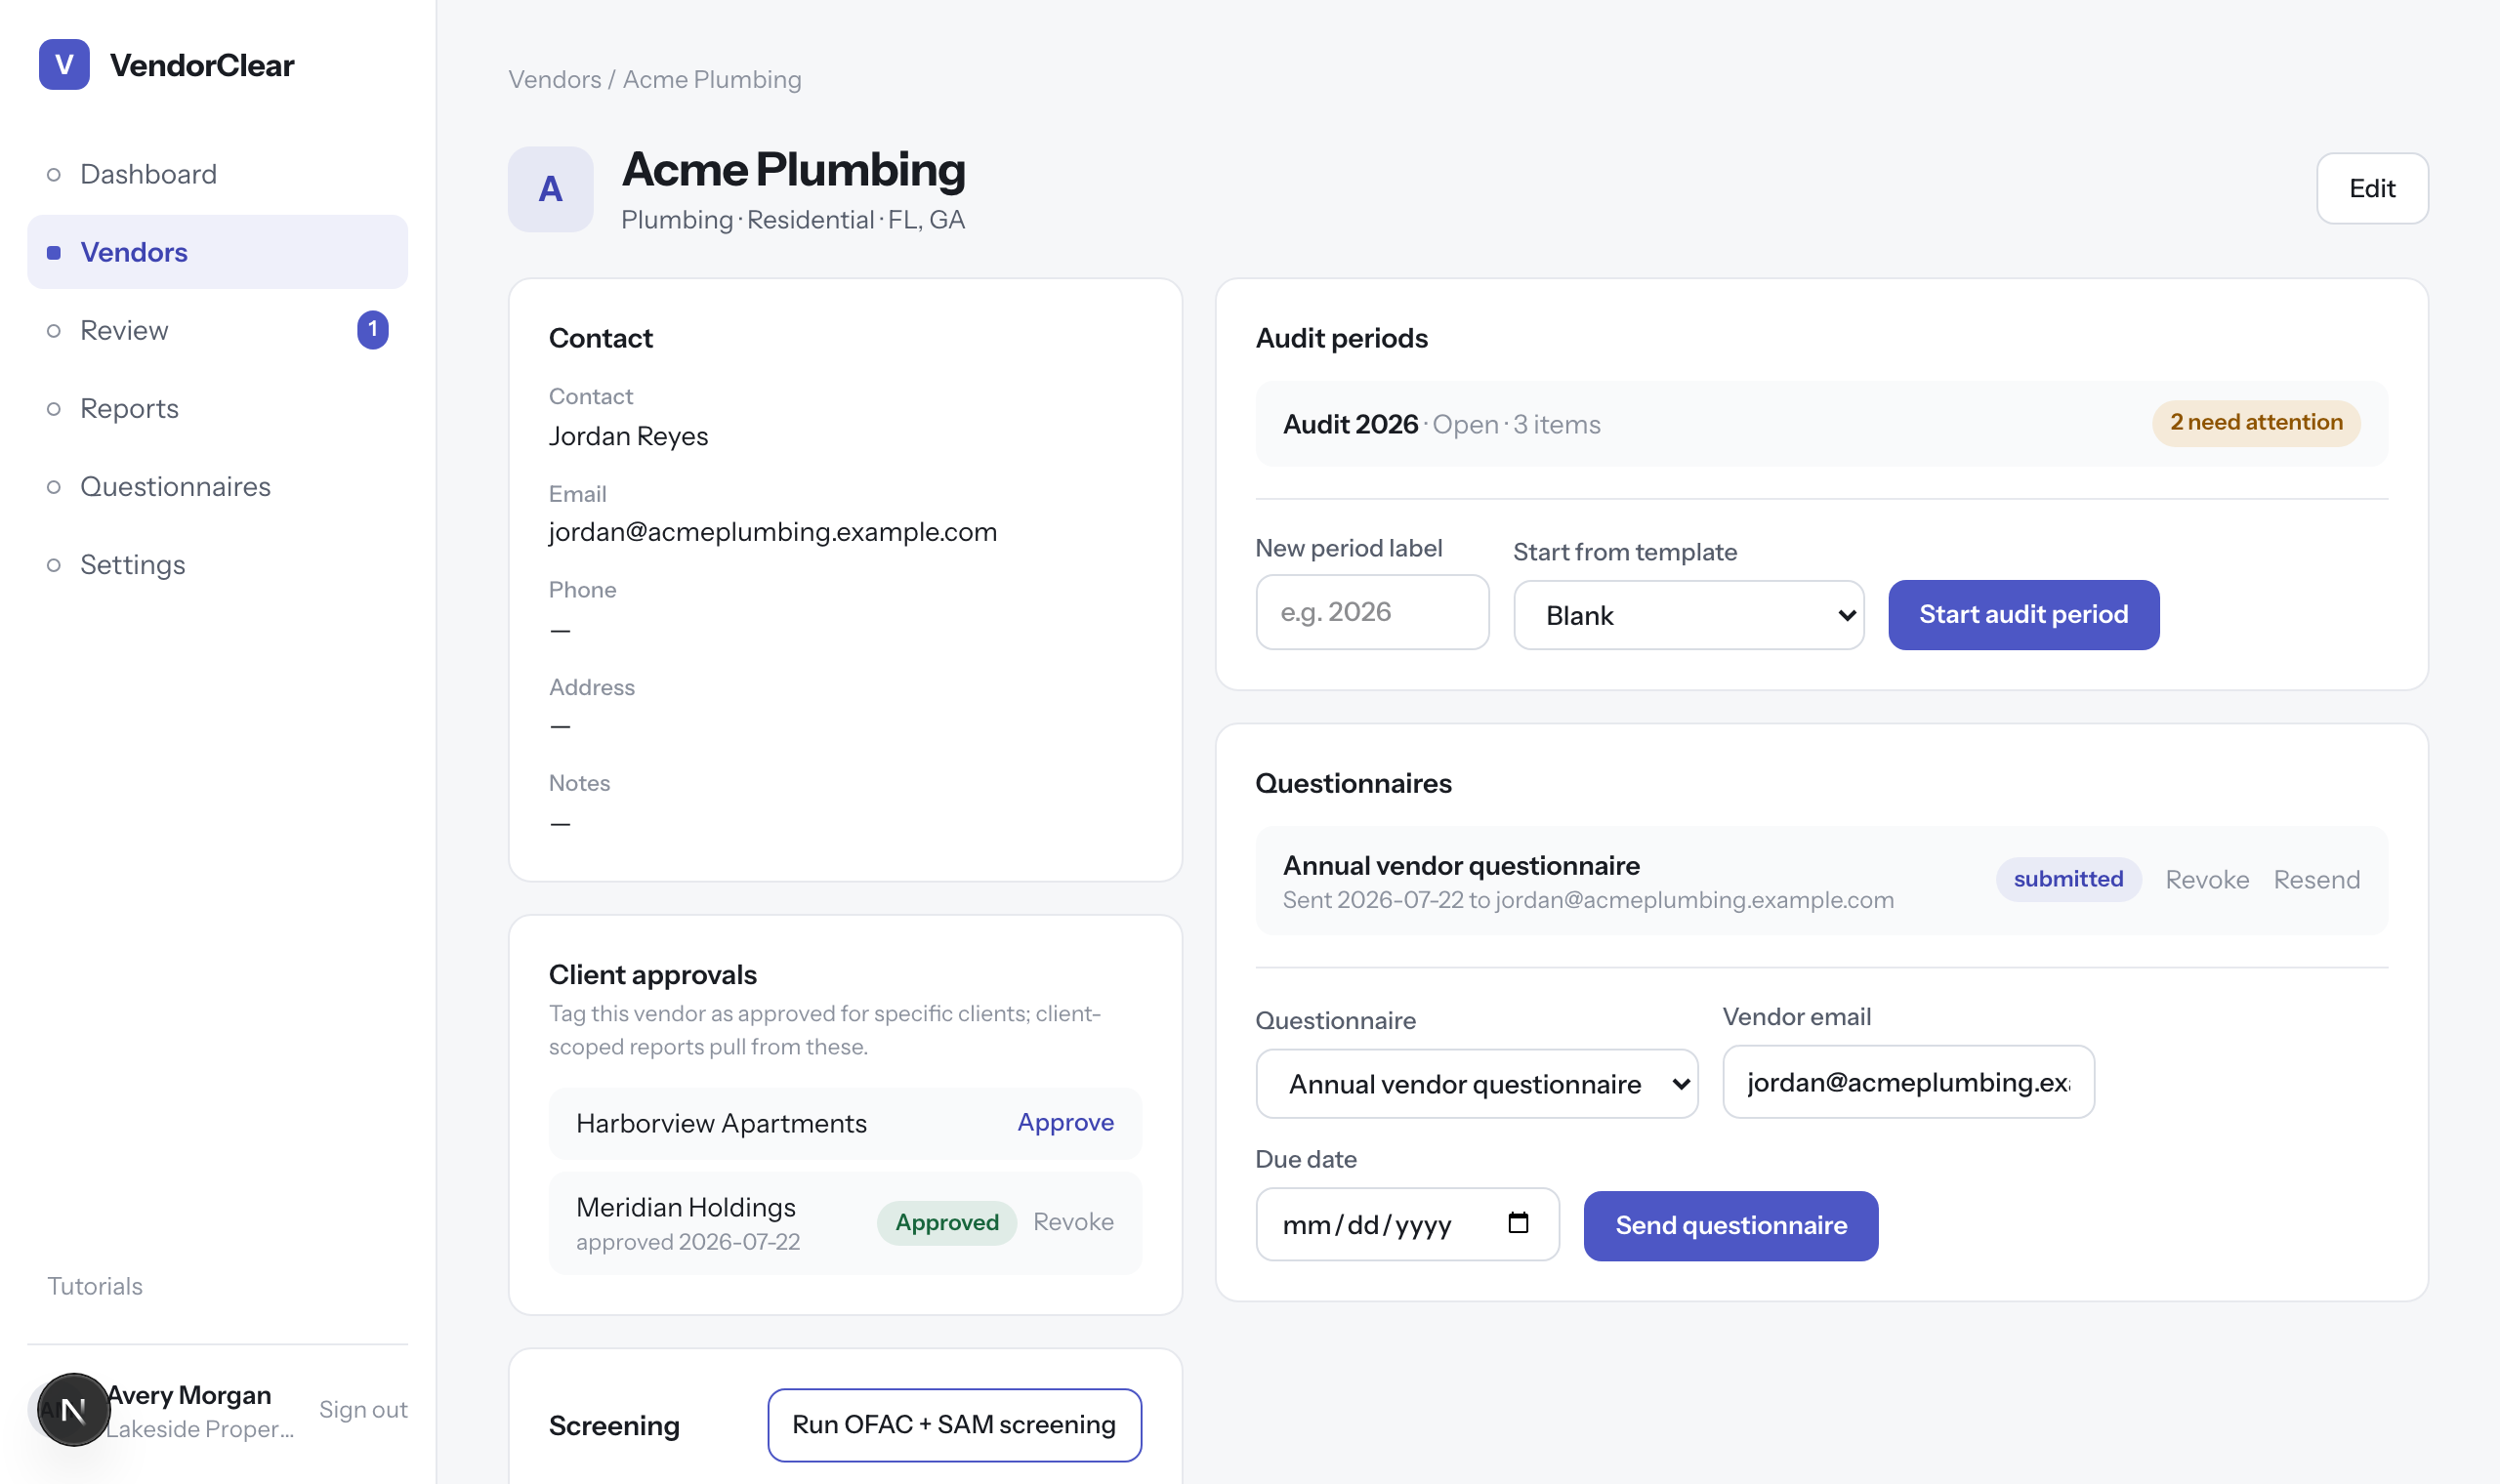
The vendor profile — contact, audit periods, questionnaire activity, and screening runs in one place. Tip · The profile is the vendor's permanent record. Approvals, revision requests, and screening evidence all accumulate here, year over year.

