Tutorials / Audit checklists & documents
Audit checklists & documents
Turn your yearly audit into a reusable checklist template, then track documents and expirations per vendor per year.
- 1
Build a checklist template
In Settings → Checklist templates, create a template such as “Standard yearly audit” and add items — proof of insurance, W-9, license. For each item, mark whether it Requires document and whether it Requires expiration (like an insurance certificate that lapses).
- 2
Start an audit period
On a vendor's profile, label a new period (typically the year, e.g. “2026”), pick the template, and choose Start audit period. The template's items are copied into the period at that moment.
Good to know · Periods are snapshots. Editing a template later never rewrites an audit that's already underway or closed — history stays exactly as it happened. - 3
Track each item
Every item is Missinguntil you attach its document or mark it received; you can also waive items that don't apply. Set the expiration date and the app derives the rest — Expiring inside your warning window, Expired past it, OK otherwise.
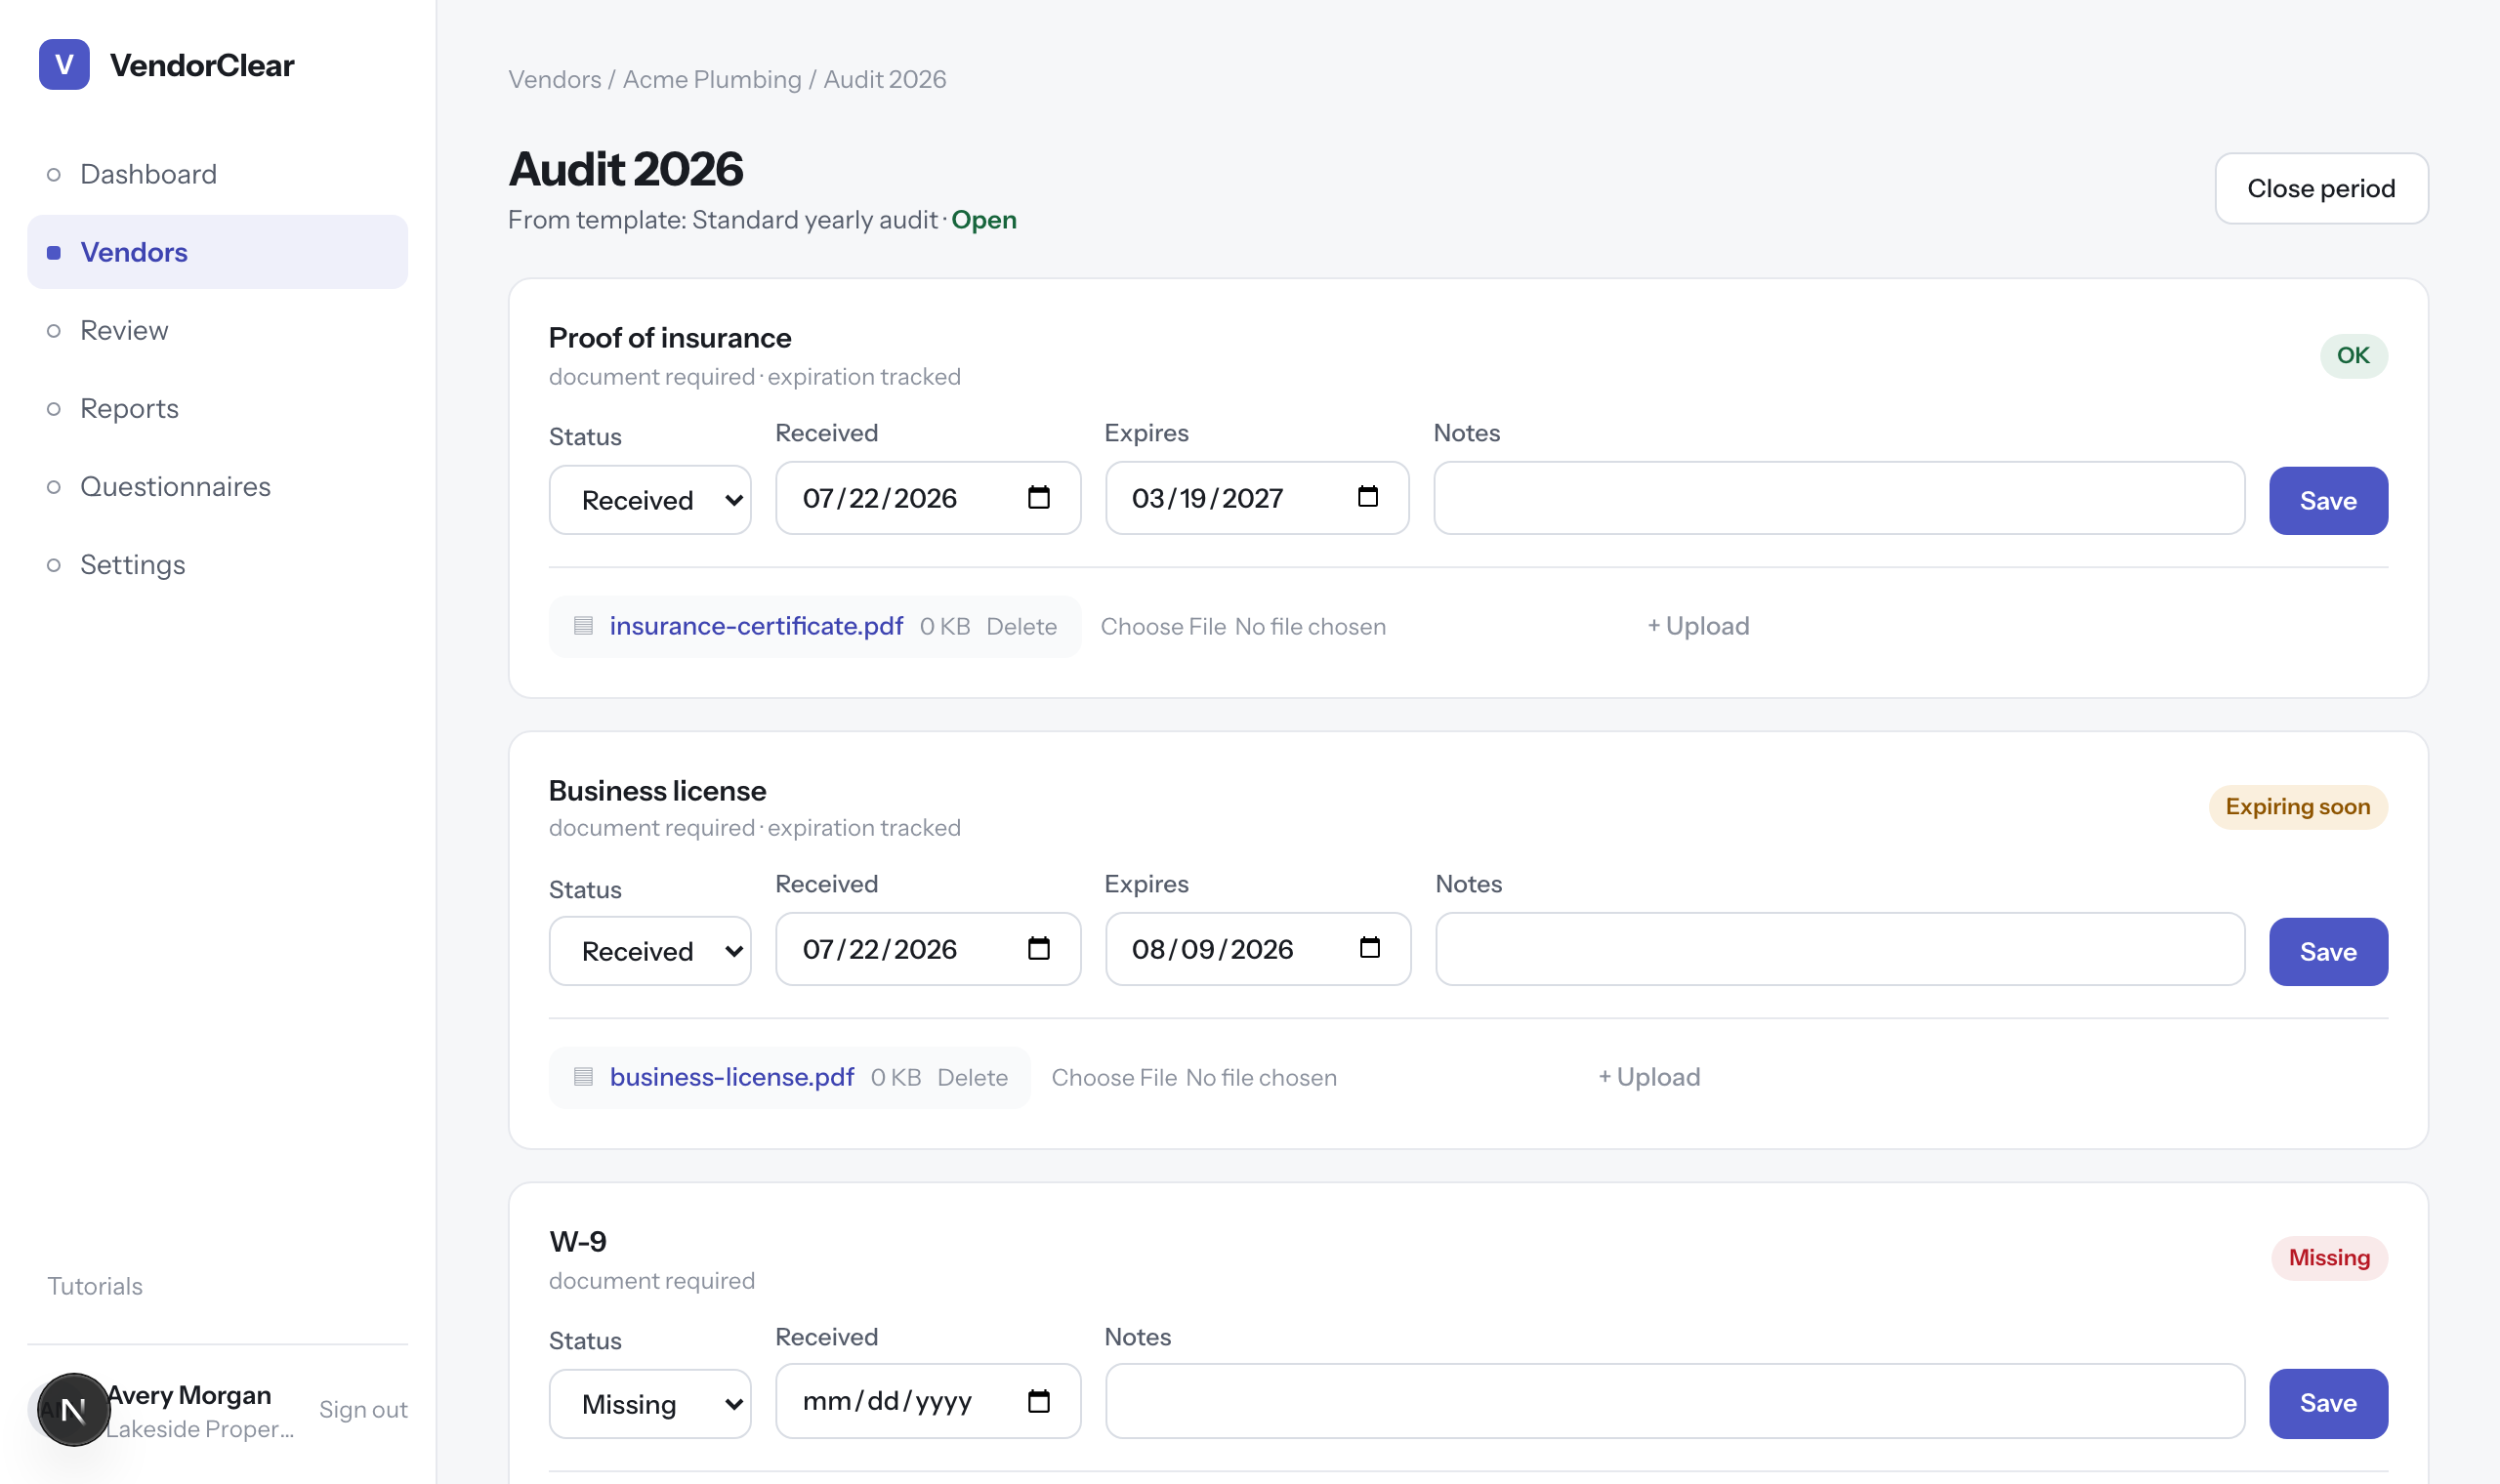
An audit period — each item with its status, dates, notes, and attached documents. - 4
Attach documents
Upload PDFs, images, or Office files (up to 25 MB) straight onto an item, or copy a vendor's questionnaire attachment onto it from the review screen — see Reviewing submissions. Files are stored privately per organization and download only for your team.
- 5
Watch the dashboard
The Dashboard timeline plots upcoming expirations over the next few months, and its counts of expired and missing items link straight to the vendors that need work.
