Tutorials / Reports & client approvals
Reports & client approvals
Tag vendors as approved for specific clients, then export vendor-status reports — for the whole organization or per client.
- 1
Define your clients
In Settings → Clients, list the clients your vendors work for — a property, a customer, a site. Clients are just names here; they never get accounts or emails.
- 2
Approve vendors for clients
On a vendor's profile, the Client approvals card lists every client with an Approve action. Approving stamps the date; revoking removes it. A vendor can be approved for any number of clients.
- 3
Generate a report
Open Reports in the sidebar. Choose a scope — all vendors, or only those approved for one client — tick which contact details to include, and Generate report. The preview shows each vendor's onboarding date, latest audit period, compliance state, and most recent screening result, plus the approval date when the report is client-scoped.
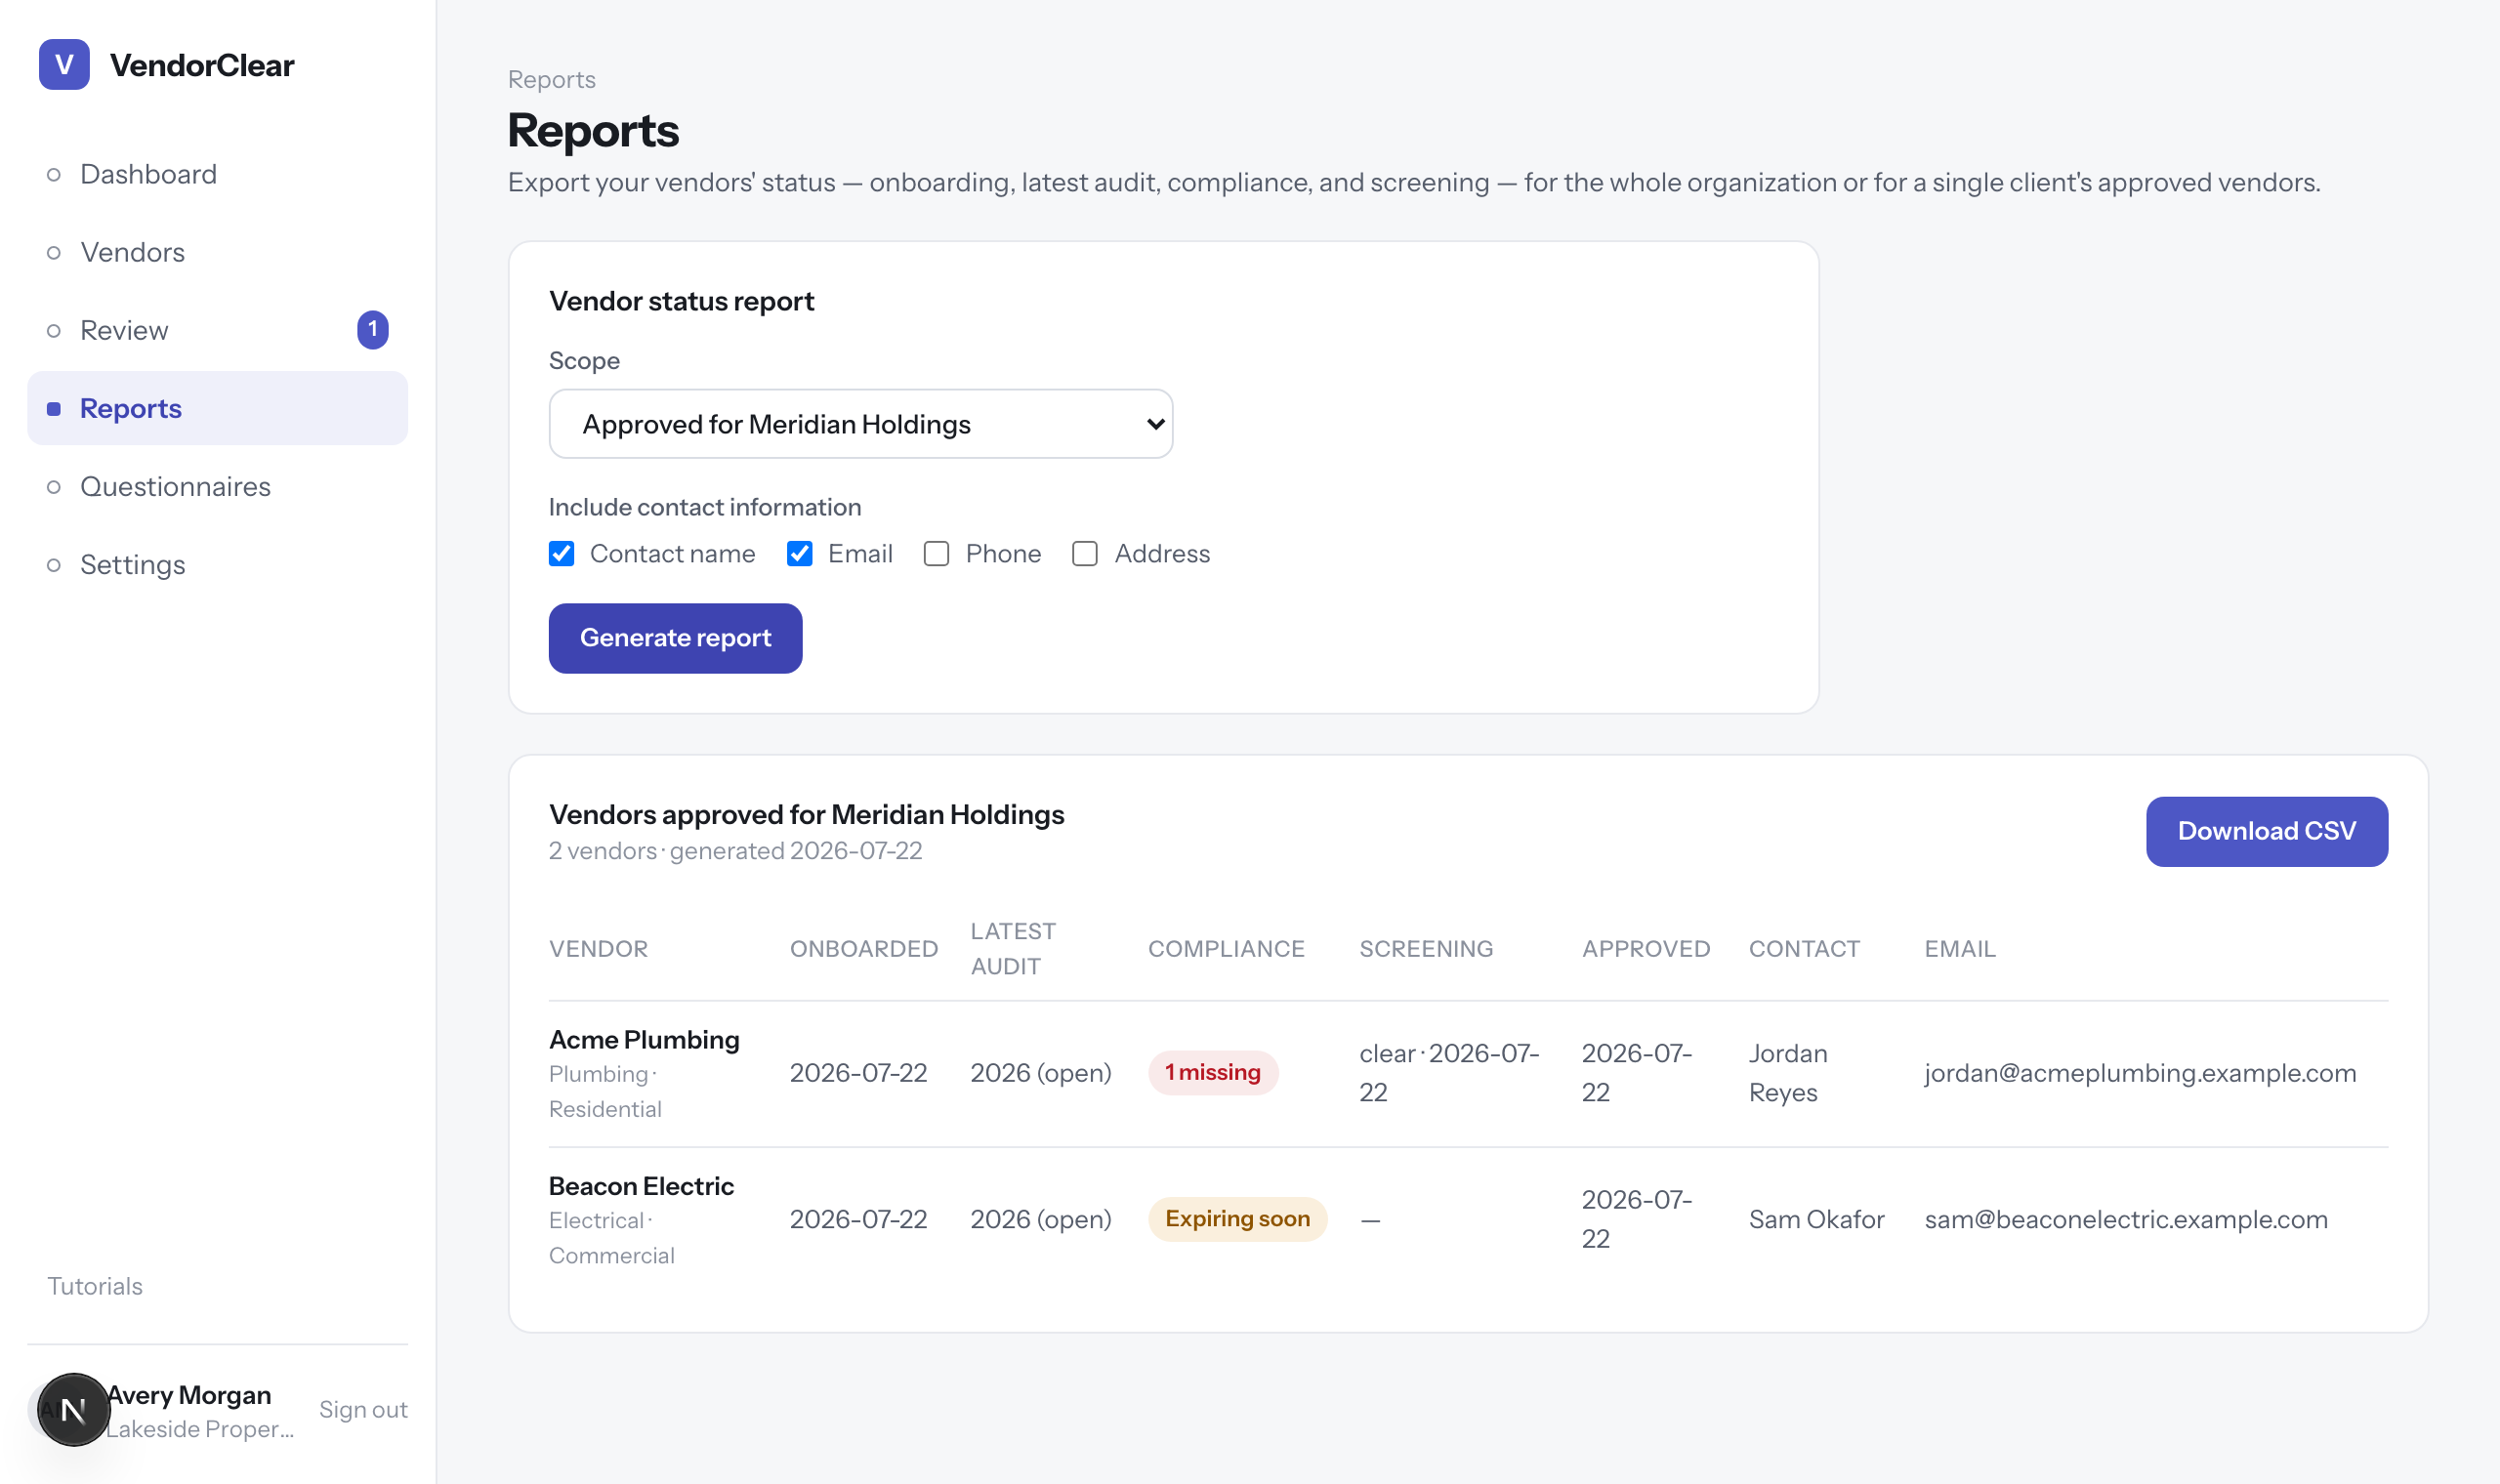
A client-scoped report — status, compliance, screening, and approval dates for that client's vendors. - 4
Export the CSV
Download CSVexports exactly what you generated — same scope, same contact columns — ready for Excel, Google Sheets, or attaching to an email. The file is named for the client and the date, so “send me this year's approved vendor list for Meridian” is a two-click errand.
Tip · Reports read live data — there's nothing to sync or rebuild. Generate one any time a client or auditor asks.
