Tutorials / Reviewing submissions
Reviewing submissions
Send a questionnaire, let the vendor answer over a secure link, then approve, request changes, or reject from the review queue.
- 1
Send it to a vendor
On the vendor's profile, choose Send questionnaire. The vendor's contact gets an email with a private, single-vendor link — they open it in any browser, no account or password involved.
Good to know · Links are unguessable and stored only as one-way hashes. They expire, can be revoked, and are rotated automatically on every resend and revision request — an old link simply says the page is unavailable. - 2
The vendor answers
The vendor fills in your questions and attaches any requested documents, then submits. The send's status flips to submitted and the submission joins your Review queue — the sidebar badge shows how many are waiting.
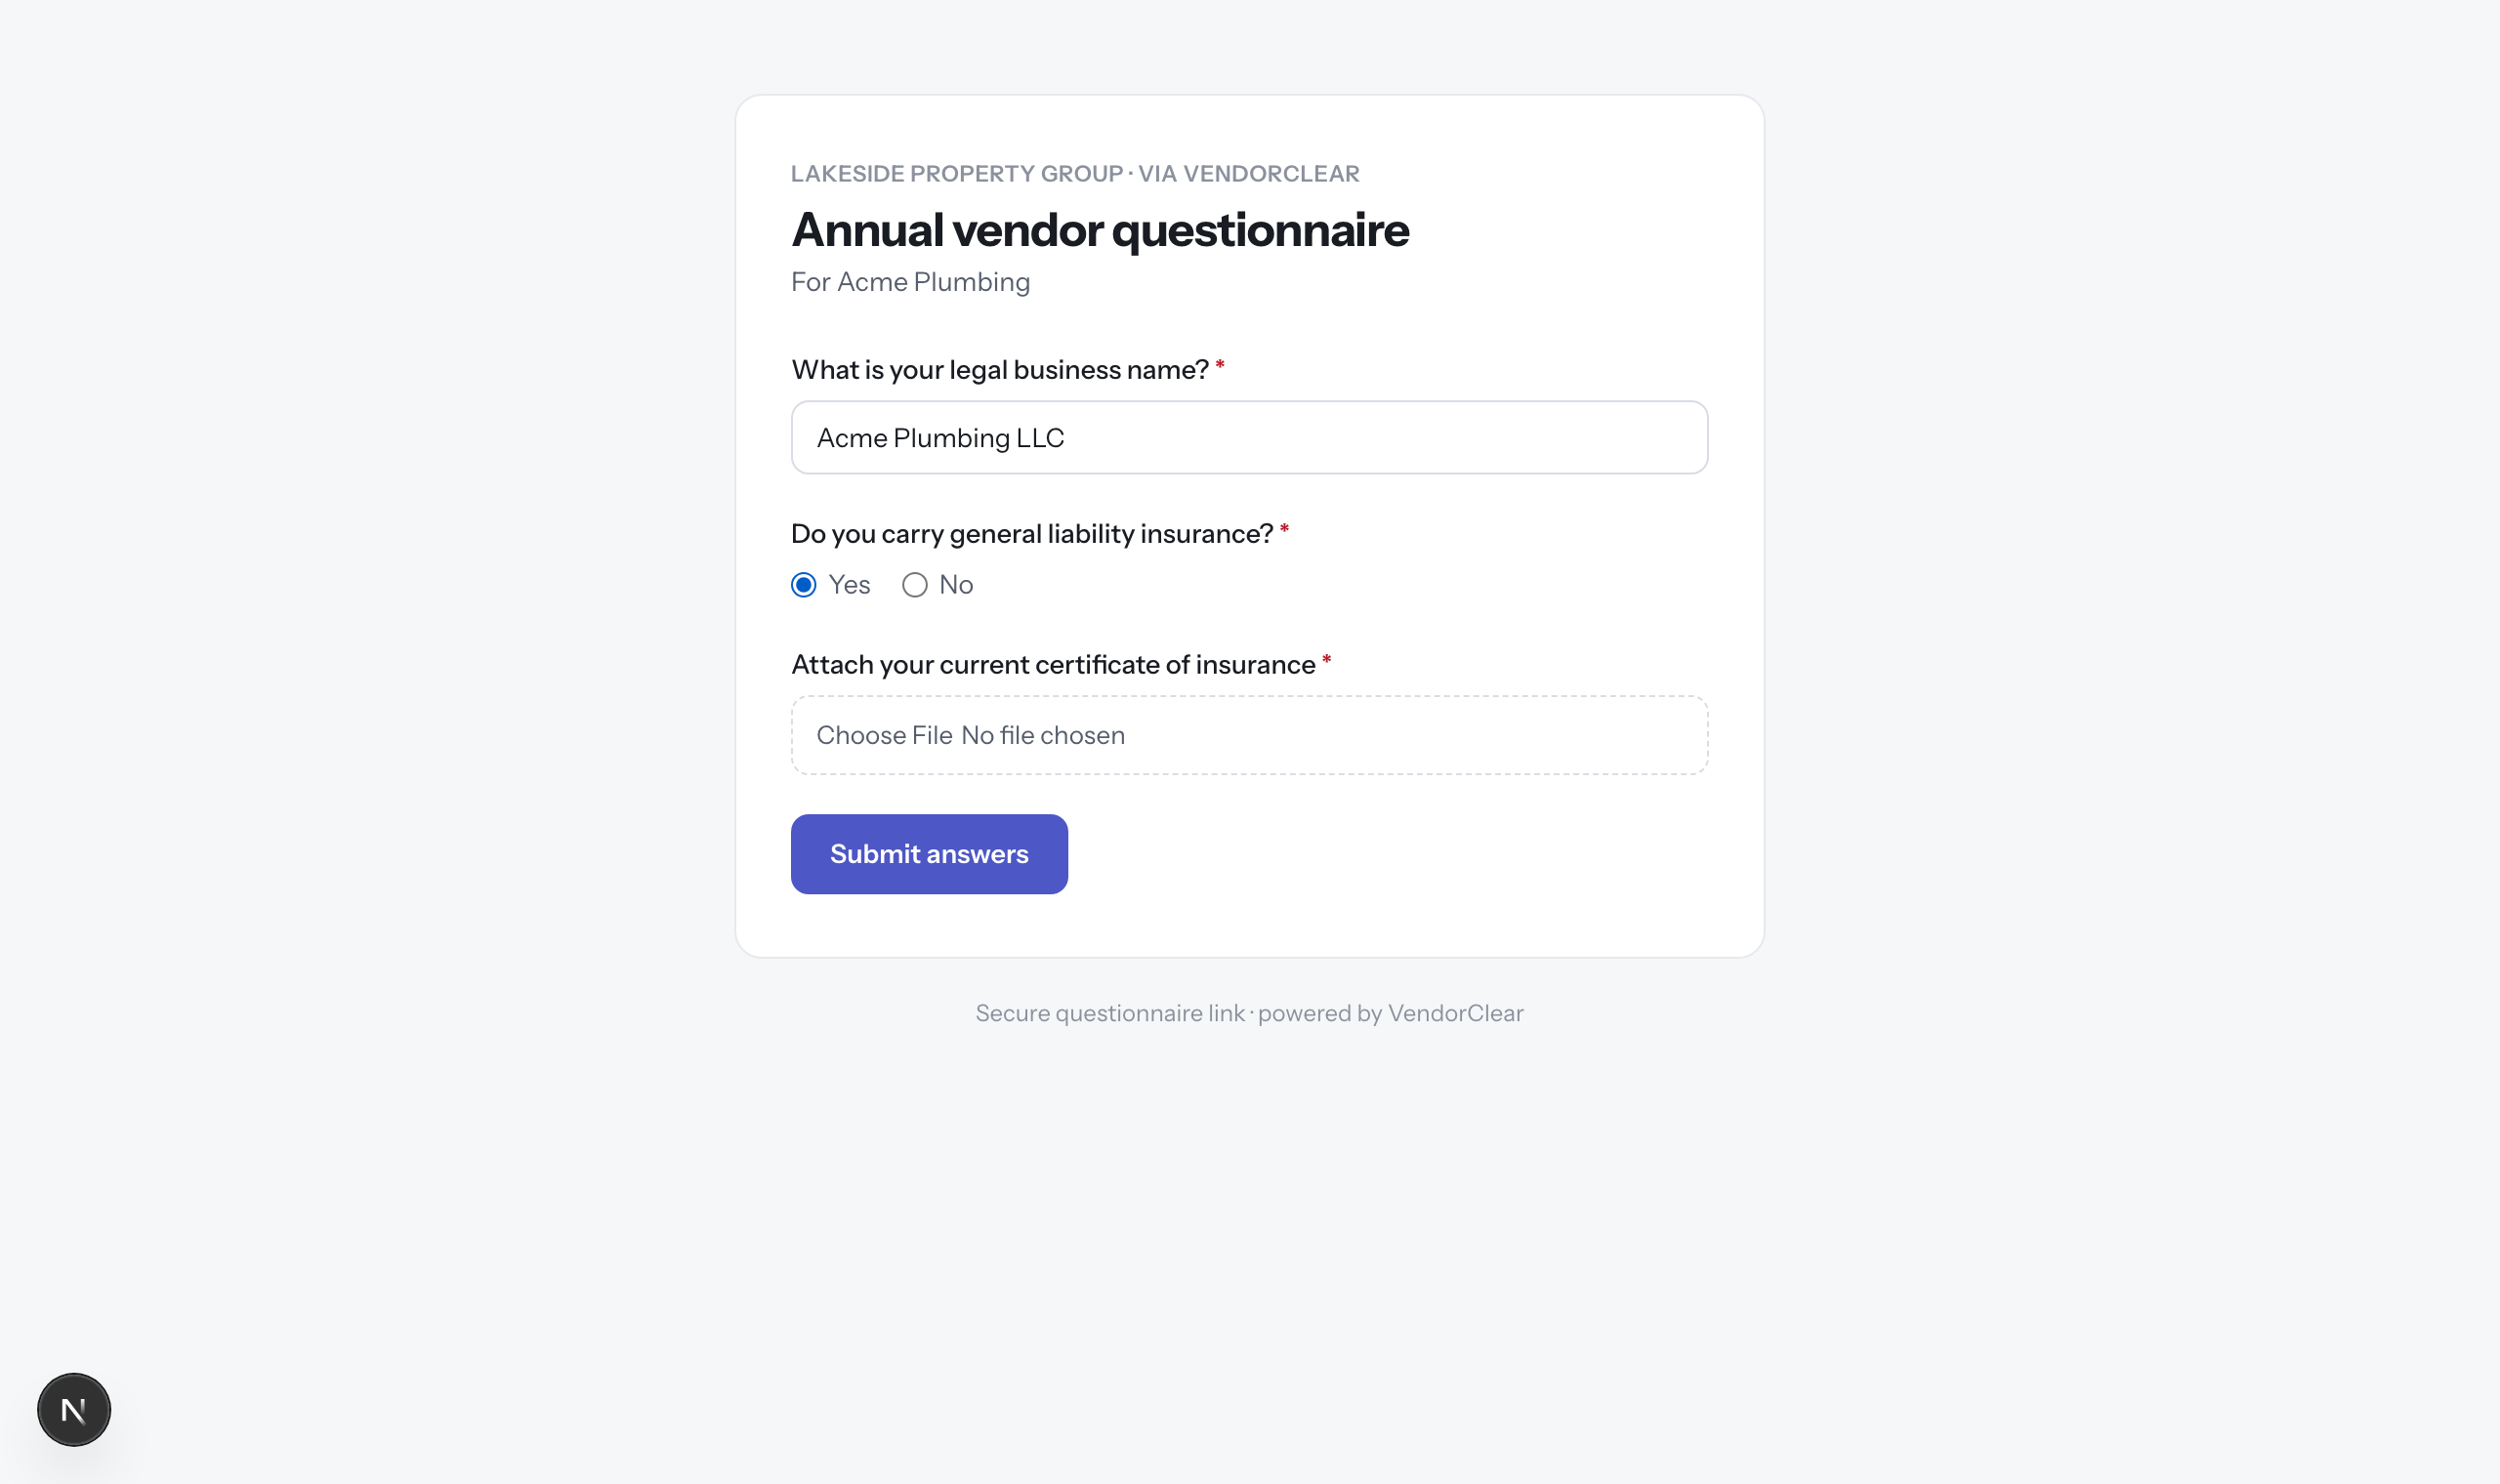
What the vendor sees — your organization's name, your questions, no account required. - 3
Review the answers
Open a submission to see every answer alongside its question, with attachments you can download. Then decide:
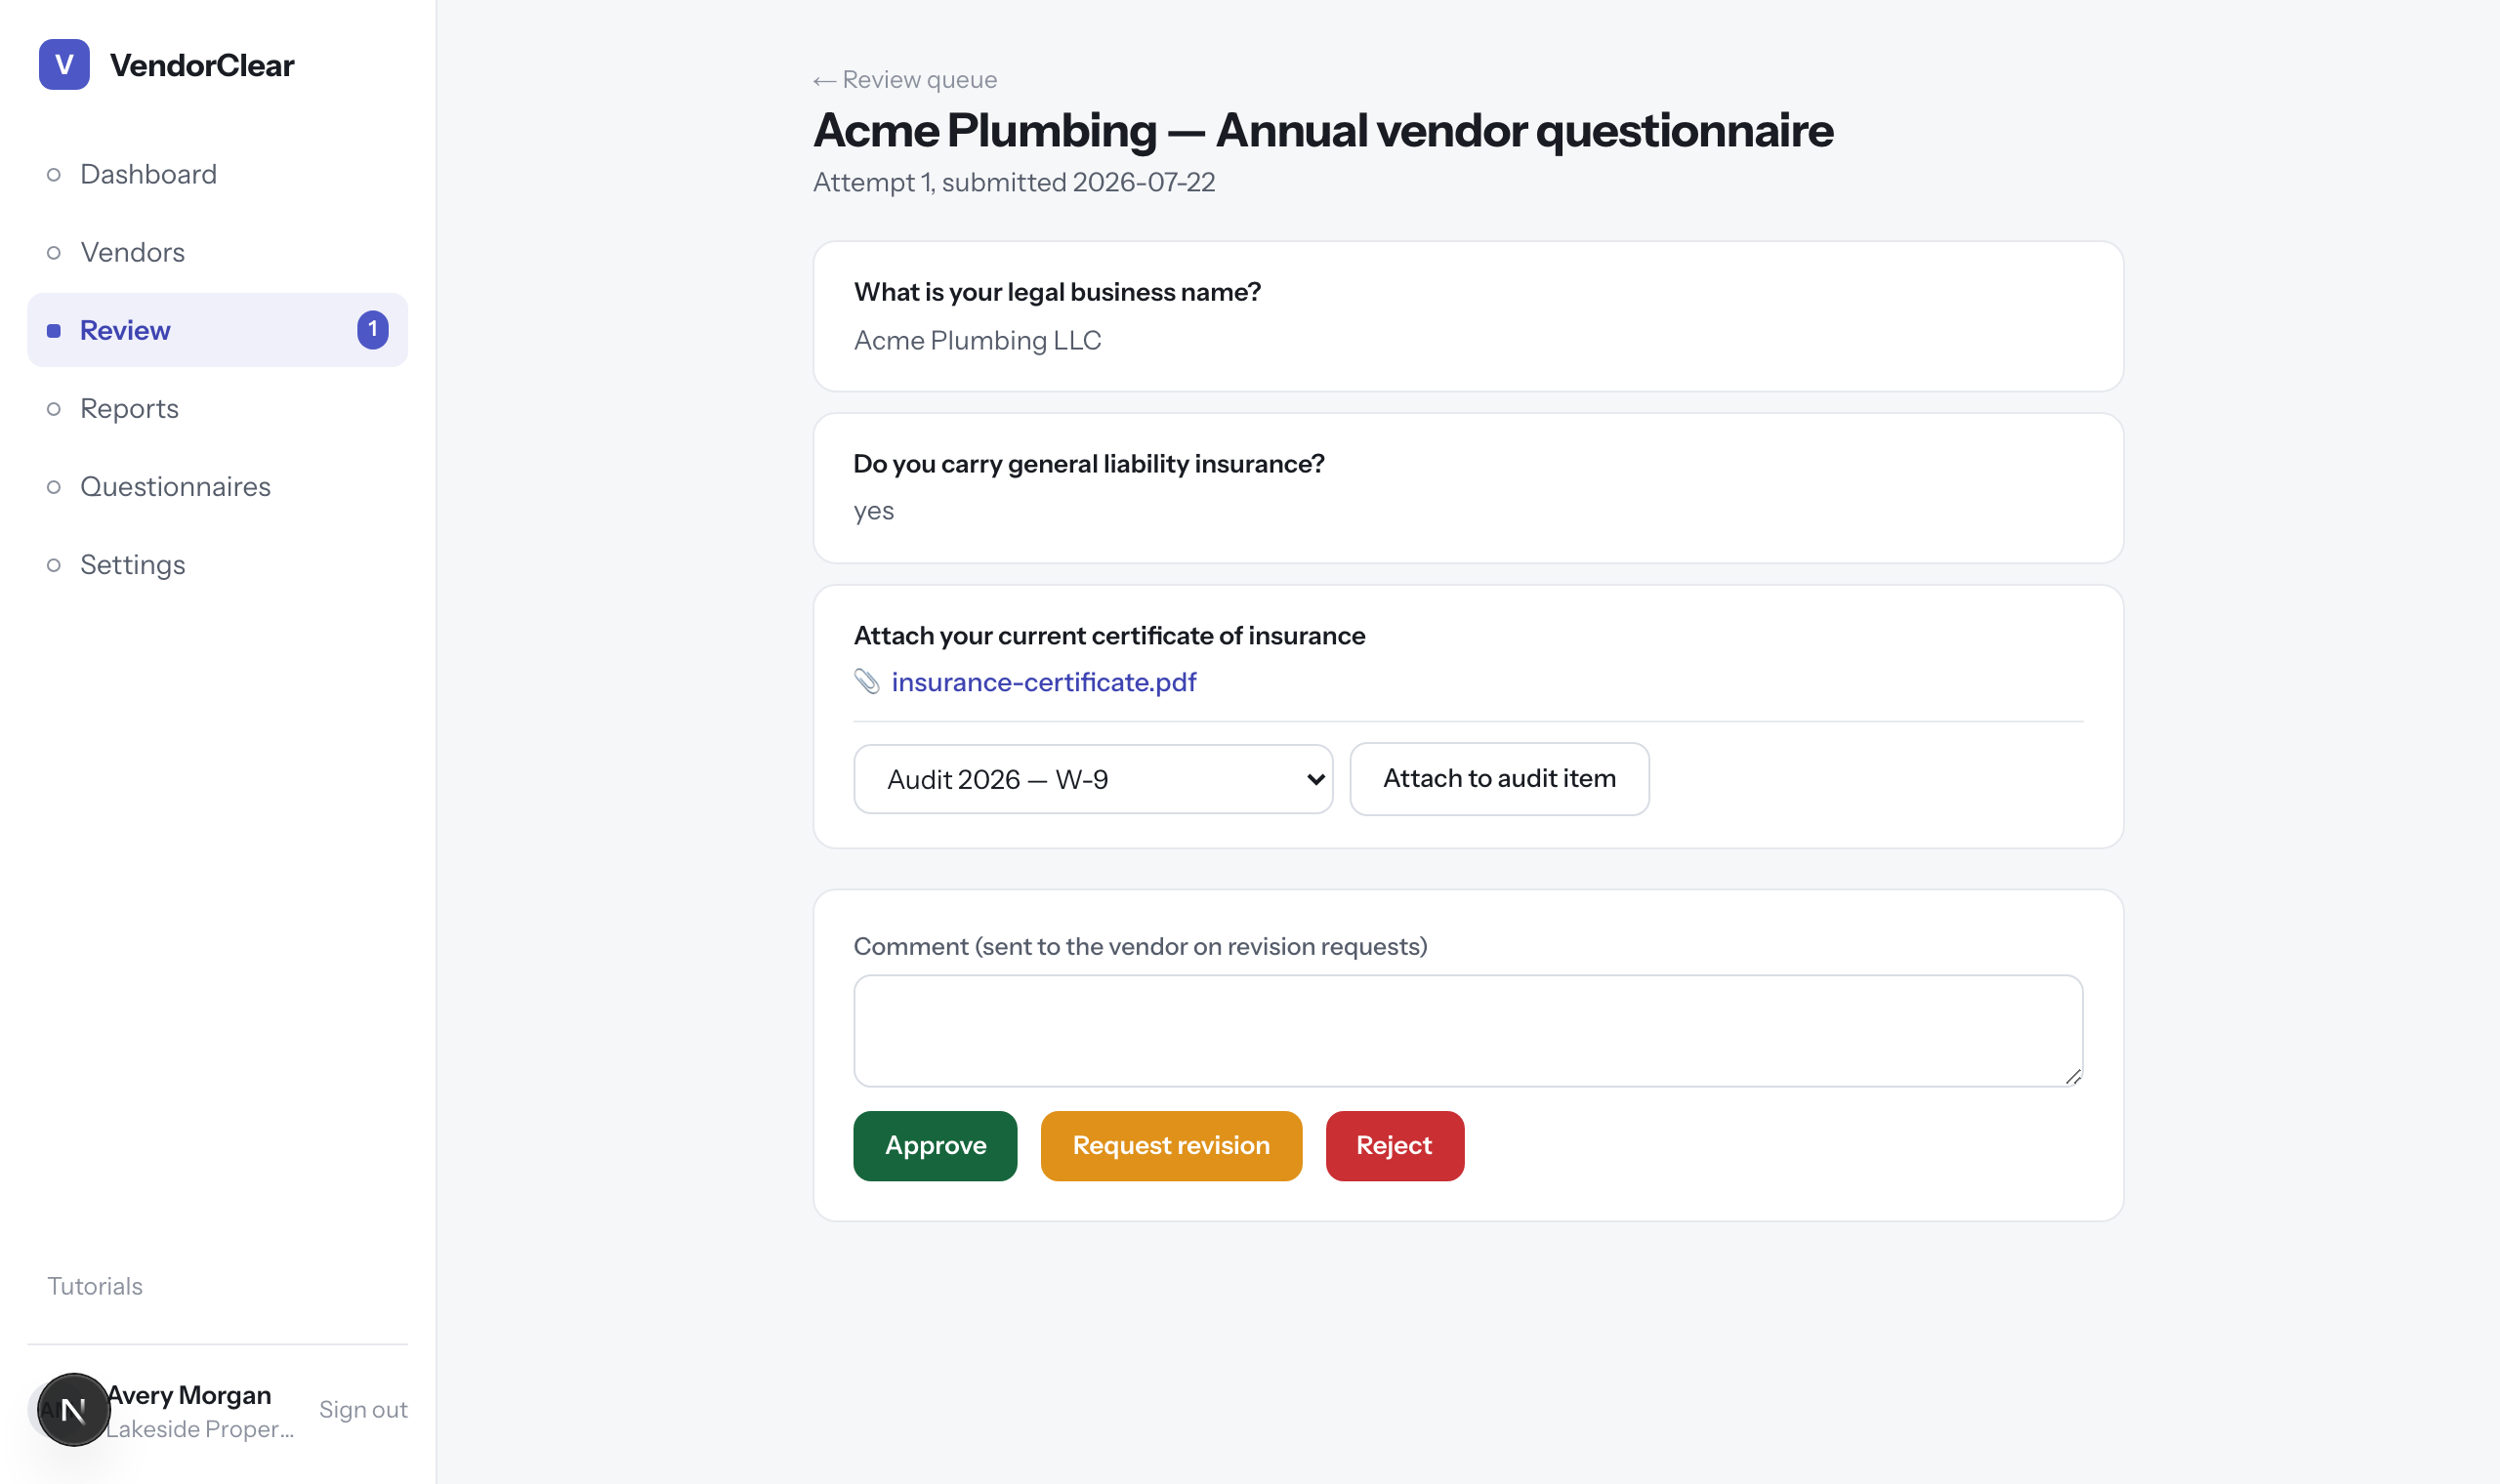
A submission under review — answers beside their questions, attachments, and the decision buttons. Approve records the outcome on the vendor's profile. Request revision sends your comment to the vendor with a fresh link — their resubmission comes back as attempt 2 with the full history preserved. Reject closes it out with your reasons on record.
- 4
File attachments where they belong
When a submitted document satisfies a checklist requirement, click Attach to audit item and pick the item. The file is copied onto the audit checklist and the item flips to received — no downloading and re-uploading.

